Have you ever handed someone your business card, or perhaps a thank-you card, and felt a sense of disappointment as they glanced at it? You were pretty certain they were about to throw it into the recycling bin (or worse, the trash), never to be seen again. Goodbye, $3. Goodbye, the few minutes I spent writing out a carefully thought out thank-you, or the hours I slaved away on the design of my business card.
But what if you could show off your creative chops at the same time as showcasing your business, or genuinely thanking someone? That’s where confetti and vellum come in.
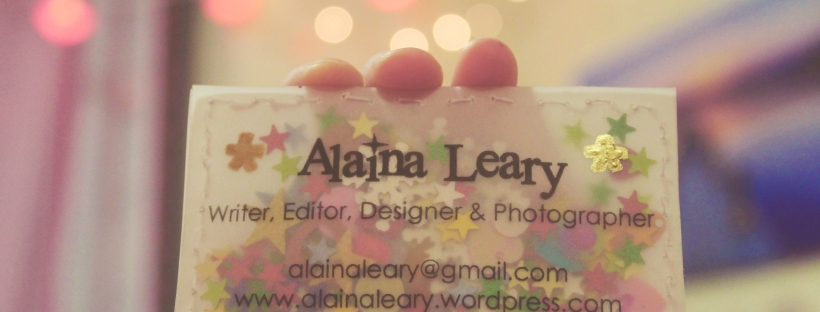
This is my business card:

Cute, simple, and to the point. It tells you my name, what I do (I’m a writer, editor, designer and photographer primarily, although I do more), how to contact me (that phone number is no longer mine, in case you’re thinking of stalking me), and where my blog is if you want more information and samples. But it tells you more than that. It tells you that I’m creative and I’m a risk-taker, because my business card is more than a boring card with my information. It’s vellum and filled with confetti. It tells you that I have sparkle and pizazz, and that’s why you should be working with me.
In this do-it-yourself tutorial, we’ll go over the basics of making this card, as well as how you can use the tutorial to create thank-you cards, bookmarks, and other trinkets for you and people you love.
(I adapted this tutorial from an idea that I got from @threadofhearts on Instagram. Check out her amazing feed about her planner obsession!)
What you’ll need:
- Vellum paper sheets (these are sold at A.C. Moore, Michael’s Stores, Amazon.com, Etsy.com, Hobby Lobby and other craft stores; they are sold in individual sheets as well as packages and it’s up to you whether you want to buy a pack or just a few for now)
- Washi tape and/or a needle and thread (You can buy washi tape online or at any craft store)
- Various styles and designs of confetti to your liking (I purchased packs of $1 confetti at A.C. Moore and a package of Spangles sequins for about $3 at A.C. Moore)
- A marker, especially if you use a gold or silver leaf pen (I used the gold leaf 18k by DecoColor, which is about $4 at WalMart. It’s my favorite gold leaf pen brand.)
- Optional: glitter (found at any craft store, as well as WalMart and Target)
- Optional: a printer
Step One. Step one depends on whether you’re going to be using a printer to write words on your object. For business cards, I would recommend a printer. Bookmarks, thank-you cards and other trinkets can be hand-written. If you’re printing, you will want to type out your words in Microsoft Word or another word processor, and simply place a vellum sheet of paper in your printer instead of a regular sheet. Your printer will print on the vellum sheet just as it would on any other paper.
Step Two. Measure and cut the vellum sheets. To create the confetti three-dimensional look, you will need two strips of vellum that are the same size. I used a ruler and a pencil to trace the size that I wanted. Business cards are typically 3.5 inches wide x 2 inches high. To make mine, I simply traced a business card I had on file. To make the thank you cards, I traced the size that I wanted for my cards, which was about 5 x 3. And finally, to make the bookmark I made for my Erin Condren Life Planner, I traced 8.5 inches x 3 inches.
Step Three. This step applies if you didn’t print your words onto the page. Now that you have measured your strips, you can use marker, pen or gold/silver leaf pen to write out your message. For my thank-you cards, I used gold leaf 18k pen to sign my name to add an extra touch. For my bookmark, I wrote “Life Sparkles” in the gold leaf pen.
Step Four. During this step, you will have to make a decision about how to connect the two pieces of vellum. I have used two different methods: sewing and washi tape. For my business card and bookmark, I used the sewing method. For my thank-you cards, I used washi tape.
Sewing method:

Washi tape method:

There are benefits to both. Using washi tape is faster, and it allows you to use smaller sized confetti without fear that it will fall out of your product. The washi tape makes a secure seal between the pieces of vellum. The only drawback is that doesn’t bond very strong, so I would recommend purchasing glue dots to help secure the tape. (I purchased glue dots at Michael’s Stores.)
Using the sewing method is a lot slower and is a more careful process, but it is a more secure hold. I also find that the seams don’t detract from the beauty of the confetti and gold leaf, whereas the washi tape kind of takes over the design. It depends on the level of simplicity you’re looking for.
If you’re going to use the sewing method, you can either use a sewing machine or sew by hand the same way you would sew cloth material. I did it by hand, but I would recommend using a sewing machine if you own one. It would cut down the time by quite a bit.
If you’re going to use the washi tape method, you just use the tape of your choice and scissors to cut the strips to the appropriate sizes and seal the vellum pieces together.
The most important part is to leave one side, or a “hole,” open in between the two vellum sheets.
Step Five. Fill the open “hole” with confetti, sequins and glitter to your heart’s content. Use the confetti of your choosing and see how it looks. You can add as much or as little confetti as you want. Keep in mind that if you want a really stuffed trinket, you’re better off using the sewing method because it holds the vellum together more securely.
Step Six. Once the vellum is filled with confetti, seal the remaining “hole” with your method of choosing. Now your product is finished!
Optional for Erin Condren planners and spiral-bound notebooks: In order to make my bookmark useful in my Erin Condren planner, I secured coil clips to the back of it so I could pop it into my planner. You can use coil clips in a similar way if you’ll be using the bookmark for a journal or a notebook. I purchased spiral snaps on Etsy by AnchorLime Design because Erin Condren was currently out of stock.
How I use my bookmark in my planner:

Once you have sealed your product, you’re free to show off your new business card, use your bookmark or send off your thank-you cards. If you’re giving out a bookmark, card, or just a little trinket as a show of affection, I guarantee the person you’re giving it to will be thrilled. As soon as I made my planner bookmark, I offered one to my girlfriend – and she was ecstatic. Using vellum and confetti is just a great way to give your life a three-dimensional, sparkly look that brings color into your everyday life.
(Don’t feel like doing the work, but want a beautiful confetti business card, bookmark, thank you or something custom? Check out my Etsy shop!)
Love Always,
Alaina


Happy crafting!

These look so pretty!
LikeLike
These are so cute! 😀
LikeLike
Thanks so much!
LikeLike
YOU ARE SO CRAFTY AND CUTE AND UGH. I want all of it!
LikeLike
Thanks so much!
LikeLike
Reblogged this on Evelyn in Disney.
LikeLike
Dude I even want these
LikeLike
Thanks! I’m thinking about selling them.
LikeLiked by 1 person
You should totally sell them! I would buy one. I just want to let you know I saw this project on tumblr, and it inspired me to make my own planner, and it has made me super happy so thank you. I linked to this tutorial on my blog, I hope that is ok it is just so awesome.
http://sarahganly.blogspot.com/2015/04/have-it-all-step-1-life-planner-binder.html
LikeLike
Wow, thanks! I am so glad you enjoyed the project. 🙂 Thank you for linking to my blog!
LikeLiked by 1 person
Thank you! and if you do sell them I would love a link to get my own =)
LikeLike